
Once you have decided to transition your codebase to Swift, you do not have to do it all at once.
In fact, it is perfectly fine to leave some parts of your app in Objective-C.
Apple offers great interoperability between the two anyway.
We recommend starting with a class that is not subclassed, as you cannot subclass a Swift class in Objective-C, and a class with the least relative complexity.
This approach is roughly summarised through this flowchart:
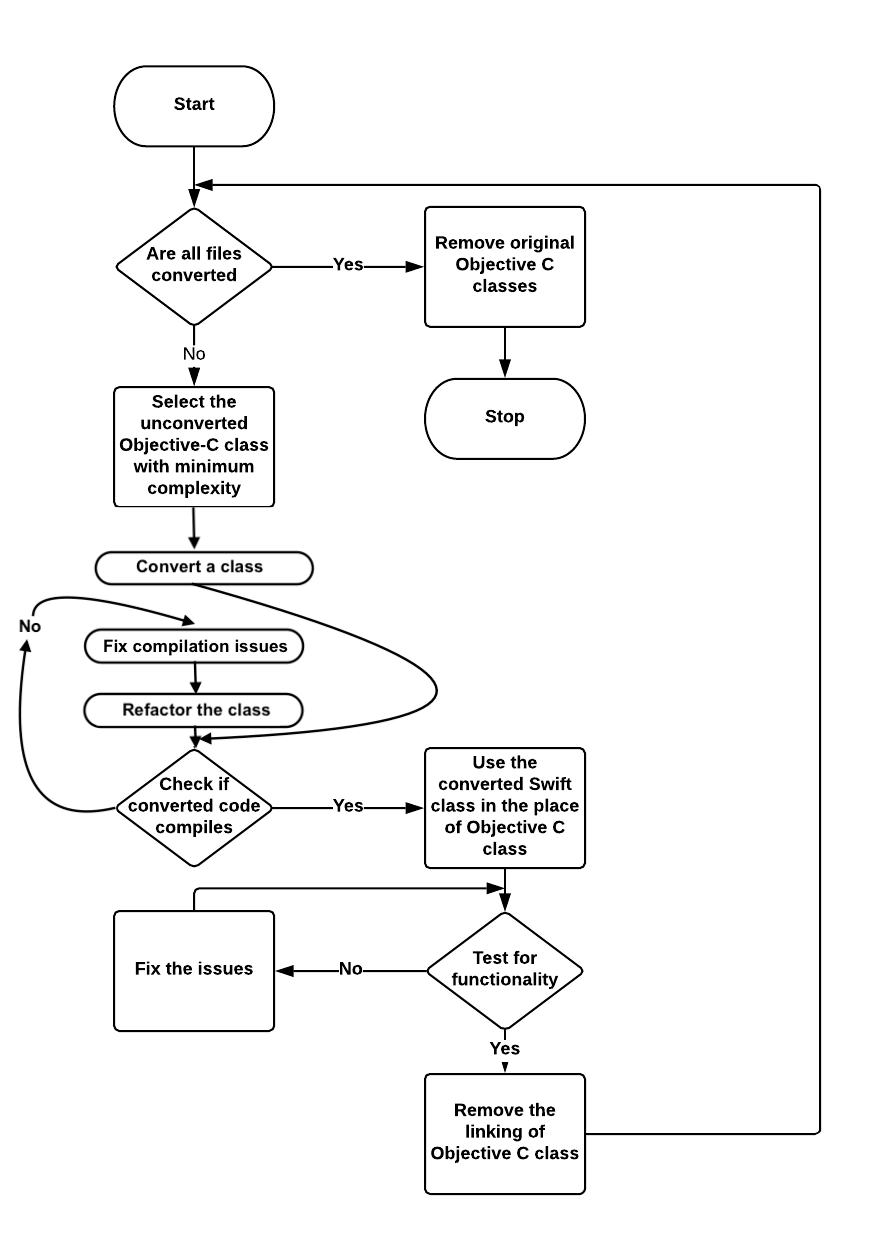
This was our approach while converting SVProgressHUD to Swift using Swiftify.
Think of the code migration as a marathon, not a sprint. The key is
to make small, focused changes.
We recommend starting with a class that is not subclassed, as you cannot subclass a Swift class in Objective-C, and a class with the least relative complexity.
Converting categories to Swift first can be a good starting point.
This was our approach while converting SVProgressHUD to Swift using Swiftify.
Swiftify's Advanced Project Converter helps a lot with this process as it:
- keeps a backup of the original Objective-C code, which you can revert to just in case the conversion of the file leads to some issues with the project
- updates the bridging header automatically
- updates links to Storyboard and XIB
- replaces the project linking of the original Objective-C files with the converted Swift files.
For more perspective, please read our post on best practices to migrate your Objective-C project using Swiftify.
In addition, the following articles may be very helpful for your project migration:
- Migrating Your Objective-C Code to Swift [ Apple ]
- How to Convert a full Objective-C app to Swift [ Google Developers ]
- Translating your Objective-C project to Swift [ Matt Neuburg, O'Reilly ]
- Case Study: Migrating from Objective-C to Swift [ Dominique Stranz, OLX ]
- Using Objective-C and Swift Bridging Headers
Comments
0 comments
Please sign in to leave a comment.